Android Design Library: Diferentes formas de implementar NavigationView y DrawableLayout
Ahora que lleva ya un tiempo la Android Design Support Library, he decidido actualizar algunos de mis proyectos con esta librería y en uno de los proyectos el NavigationView tenia unos items que podían variar (añadir o quitar) y otros como pie de página en la parte inferior del NavigationView como podían ser: compartir, valorar la aplicación, etc… Y en otros el DrawerLayout estaba por debajo del Toolbar.
Standard
Según pone en el articulo de Android Design Support Library sin modificar nada se haría así:
<android.support.v4.widget.DrawerLayout
        xmlns:android="http://schemas.android.com/apk/res/android"
        xmlns:app="http://schemas.android.com/apk/res-auto"
        xmlns:tools="http://schemas.android.com/tools"
        android:id="@+id/drawer_layout"
        android:layout_width="match_parent"
        android:layout_height="match_parent"
        android:fitsSystemWindows="true"
        tools:openDrawer="start">

        <!-- Content here -->

        <android.support.design.widget.NavigationView
            android:id="@+id/nav_view"
            android:layout_width="wrap_content"
            android:layout_height="match_parent"
            android:layout_gravity="start"
            android:fitsSystemWindows="true"
            app:headerLayout="@layout/nav_header_main"
            app:menu="@menu/activity_main_drawer" />

    </android.support.v4.widget.DrawerLayout>

Con pie de página
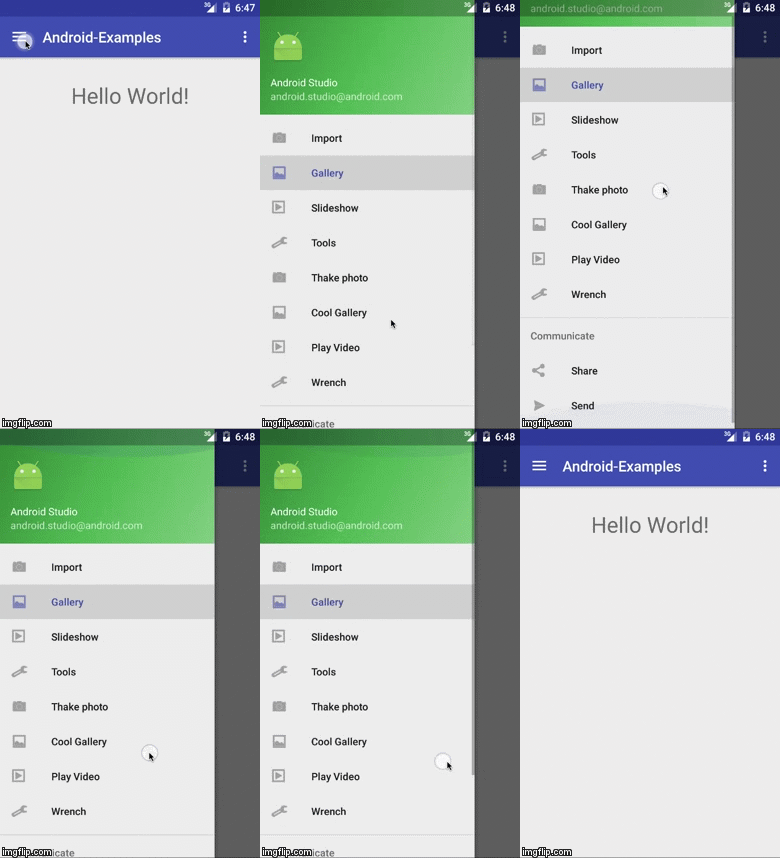
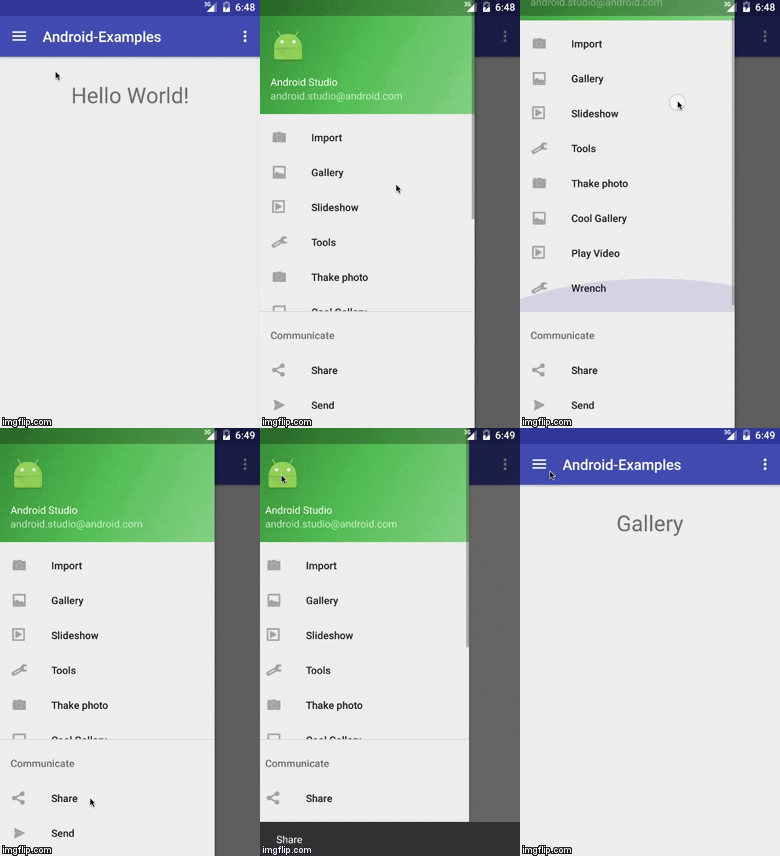
Si quieres que los items de pie de página estén visibles en todo momento, aunque haya muchos items encima, esta es una posible forma de implementarlo:
  <android.support.v4.widget.DrawerLayout
        xmlns:android="http://schemas.android.com/apk/res/android"
        xmlns:app="http://schemas.android.com/apk/res-auto"
        android:id="@+id/drawer_layout"
        android:layout_width="match_parent"
        android:layout_height="match_parent"
        android:fitsSystemWindows="true">

        <!-- Content here -->

        <android.support.design.widget.NavigationView
            android:id="@+id/navigation_drawer_container"
            android:layout_width="wrap_content"
            android:layout_height="match_parent"
            android:layout_gravity="start">

            <RelativeLayout
                android:layout_width="match_parent"
                android:layout_height="match_parent">

                <android.support.design.widget.NavigationView
                    android:id="@+id/navigation_view_body"
                    android:layout_width="wrap_content"
                    android:layout_height="match_parent"
                    android:layout_gravity="top"
                    app:headerLayout="@layout/nav_header_main"
                    app:menu="@menu/body_nav"
                   android:layout_above="@+id/navigation_view_bottom"/>

                <android.support.design.widget.NavigationView
                    android:id="@+id/navigation_view_bottom"
                    android:layout_width="wrap_content"
                    android:layout_height="wrap_content"
                    android:layout_alignParentBottom="true"
                    app:headerLayout="@layout/bottom_nav_header"
                    app:menu="@menu/footer_nav" />

            </RelativeLayout>

        </android.support.design.widget.NavigationView>

    </android.support.v4.widget.DrawerLayout>
- Body — NavigationView de la parte superior que contendrá el header y los items principales.
- Footer — NavigationView en la parte de abajo que siempre se mostrará.
- Container — El NavigationView que contiene a los dos anteriores (es opcional).
Para que aparezca una linea separadora entre las dos listas (divider), hay que añadir el atributo headerLayout en el navigation_view_button con el siguiente layout:
bottom_nav_header.xml
    <?xml version="1.0" encoding="utf-8"?>
    <LinearLayout xmlns:android="http://schemas.android.com/apk/res/android"
        android:orientation="vertical"
        android:layout_width="match_parent"
        android:layout_height="wrap_content">
        <View
            android:layout_width="match_parent"
            android:layout_height="1dp"
            android:background="#d5d5d5" />
    </LinearLayout>
El NavigationView que funciona como contenedor se puede quitar y dejar tan solo el RelativeLayout, pero lo mantengo por si necesito usar alguna utilidad del NavigationView como, por ejemplo, poner el header y dejarlo fijo (que no se pueda hacer scroll).
Al tener dos NavigationViews diferentes puedes controlar las acciones sobre los items de diferente listas de una manera más “limpia”, como por ejemplo en los items de la lista principal, al pulsar que muestren diferentes fragments, y los items del footer que simplemente lancen acciones, como podría ser abrir una aplicación externa. Este sería el resultado final.

NavigationView por debajo del Toolbar
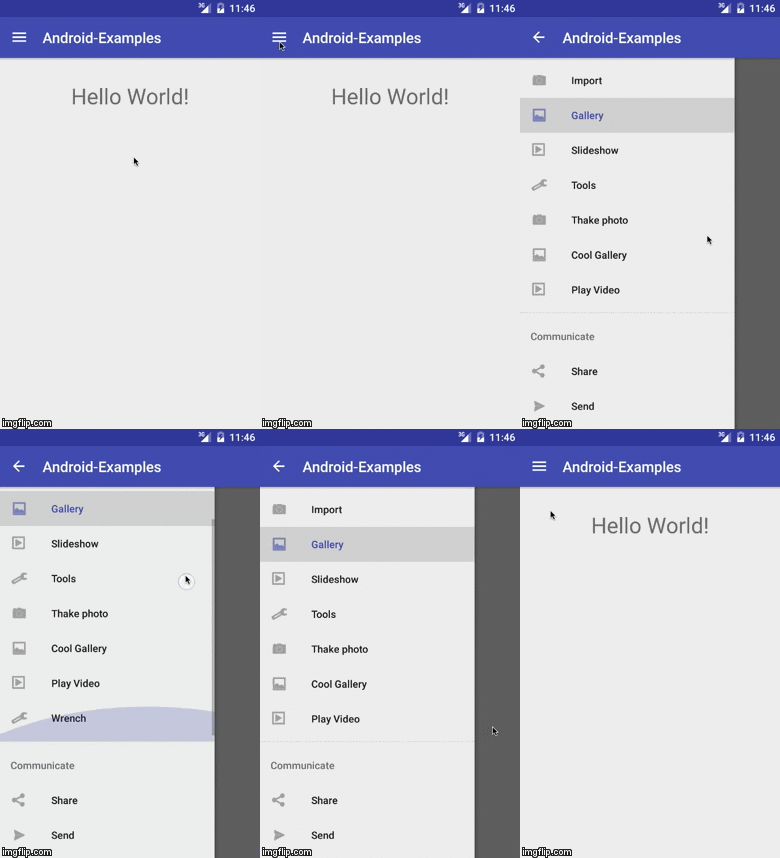
Si se desea que el NavigationView este por debajo del Toolbar, lo normal es que no tenga headerLayout ya que el espacio de la lista será más reducido:
    <android.support.design.widget.CoordinatorLayout
        xmlns:android="http://schemas.android.com/apk/res/android"
        xmlns:app="http://schemas.android.com/apk/res-auto"
        xmlns:tools="http://schemas.android.com/tools"
        android:layout_width="match_parent"
        android:layout_height="match_parent"
        android:fitsSystemWindows="true"
        tools:context=".MainActivity">

        <android.support.design.widget.AppBarLayout
            android:layout_height="wrap_content"
            android:layout_width="match_parent"
            android:theme="@style/AppTheme.AppBarOverlay">

            <android.support.v7.widget.Toolbar
                android:id="@+id/toolbar"
                android:layout_width="match_parent"
                android:layout_height="?attr/actionBarSize"
                android:background="?attr/colorPrimary"
                android:theme="@style/AppTheme.AppBarOverlay"
                app:popupTheme="@style/AppTheme.PopupOverlay" />

        </android.support.design.widget.AppBarLayout>

        <android.support.v4.widget.DrawerLayout
            android:id="@+id/drawer_layout"
            android:layout_width="match_parent"
            android:layout_height="match_parent"
            android:fitsSystemWindows="true"
            tools:openDrawer="start"
            app:layout_behavior="@string/appbar_scrolling_view_behavior">

            <!-- Content here -->

            <android.support.design.widget.NavigationView
                android:id="@+id/navigation_view_container"
                android:fitsSystemWindows="true"
                android:layout_width="wrap_content"
                android:layout_height="match_parent"
                android:layout_gravity="start">

               <!-- ... -->

        </android.support.v4.widget.DrawerLayout>

    </android.support.design.widget.CoordinatorLayout>
Ahora el DrawerLayout ya no es el contenedor de la actividad sino que pasa a ser el CoordinatorLayout (o cualquier otro) y lo importante es que el Toolbar se está por encima de DrawerLayout, todo lo demás es una implementación normal del NavigationView.
Esta forma de implementar el NavigationView no es usual ya que renuncias a muchas cosas buenas que tiene Appbar y Toolbar, como podría ser Parallax o efectos similares en el que Toolbar es en algún momento más grande de lo normal ya que NavigationView estaría debajo en todo momento.

Todo el código esta incluido en Android-Examples en el modulo navigationview.andr